Beware! One batch of this is NEVER enough, so you might want to consider doubling it if you are having company.
Mo used to receive requests to make this on a regular basis.
BEST.BANANA.PUDDING.EVER.
Cook the following over medium heat, stirring constantly:
1 cup sugar
1/4 cup cornstarch
2 eggs (beaten)
2 cups milk
1 tsp. vanilla
While this is cooking, layer 'Nilla Wafters and ripened bananas in an 8" square dish. I recommend that you do a layer of cookies, a layer of bananas, and a second layer of cookies.
Pour the warm pudding mixture over the layers and SERVE immediately!
Trust me when I say:
BEST.BANANA.PUDDING.EVER.

Monday, December 29, 2014
Blackberry Cobbler
I am the cook that I am today because of my MoMo Fontenot. In fact, she has inspired almost every single thing that I prepare for my family on a regular basis. My ultimate dream is that as Corrie gets a little bigger, I will be able to pass along my love of cooking and the legacy of MoMo Fontenot to her.... After all, I AM MoMo 2.0, so it only seems natural, right?!
I lost MoMo Fontenot in August 2008, just 7 weeks after I moved to Denmark. And then in June 2013, I lost my mom, just 6 weeks after I moved back from Denmark. Some days my sense of loss surrounding my love for those 2 ladies is all consuming, and on those days, I cook. I cook something intentional, something that will soothe my soul and remind me of them. Yesterday, Sunday, Dec. 28, 2014, was one of those days.
The house was quiet and my heart was aching, so I pulled out my old recipe cards from Mo and decided it was time to fill the house with the smells of her Blackberry Cobbler. It was so familiar and it eased the ache in my heart just a little.
 I was asked by quite a few friends and even a few family members to please share this recipe, so here you go! I hope that it brings as much happiness to you and your family as it does to me and mine!
Mix the following to make your batter:
1 cup sugar
3/4 cup milk
1 egg
1 cup flour
2 tsp. baking powder
1/2 tsp. salt
Set aside.
Heat the oven to 350. As soon as it reaches 350, put 1/4 stick of butter in the bottom of your baking dish (An 8" square pan works, but I use my Pampered Chef round stone deep dish baker.) and then place the baking dish in the oven to melt the butter.
Meanwhile place 1 1/2 cups of fresh blackberries* in a saucepan with 3-4 TBSP sugar and 1/2 cup water. Heat until the sugar dissolves and the berries soften. Be careful not to break them as you stir.
Pull the baking dish out as soon as the butter is melted (make sure it does not scorch). Pour your batter into the dish on top of the butter.
Once your berries are softened, add cornstarch to the saucepan to thicken it just a bit...making sure it's not too thick!
Next, pour the berry mixture on top of the batter. It should seep through the batter, but do not stir it. It should ooze through the batter on its own.
Bake at 350 for 30 minutes.
Serve warm.
And if you have any leftovers, heat them in the microwave for about 20 seconds before serving. Trust me--this tastes BEST warm!
*Note: Mo always had blackberries in the garden because PaPa Fontenot always grew them to make his wine, but the kind you buy at the grocery store work just as well! :-)
I lost MoMo Fontenot in August 2008, just 7 weeks after I moved to Denmark. And then in June 2013, I lost my mom, just 6 weeks after I moved back from Denmark. Some days my sense of loss surrounding my love for those 2 ladies is all consuming, and on those days, I cook. I cook something intentional, something that will soothe my soul and remind me of them. Yesterday, Sunday, Dec. 28, 2014, was one of those days.
The house was quiet and my heart was aching, so I pulled out my old recipe cards from Mo and decided it was time to fill the house with the smells of her Blackberry Cobbler. It was so familiar and it eased the ache in my heart just a little.
Mix the following to make your batter:
1 cup sugar
3/4 cup milk
1 egg
1 cup flour
2 tsp. baking powder
1/2 tsp. salt
Set aside.
Heat the oven to 350. As soon as it reaches 350, put 1/4 stick of butter in the bottom of your baking dish (An 8" square pan works, but I use my Pampered Chef round stone deep dish baker.) and then place the baking dish in the oven to melt the butter.
Meanwhile place 1 1/2 cups of fresh blackberries* in a saucepan with 3-4 TBSP sugar and 1/2 cup water. Heat until the sugar dissolves and the berries soften. Be careful not to break them as you stir.
Pull the baking dish out as soon as the butter is melted (make sure it does not scorch). Pour your batter into the dish on top of the butter.
Once your berries are softened, add cornstarch to the saucepan to thicken it just a bit...making sure it's not too thick!
Next, pour the berry mixture on top of the batter. It should seep through the batter, but do not stir it. It should ooze through the batter on its own.
Bake at 350 for 30 minutes.
Serve warm.
And if you have any leftovers, heat them in the microwave for about 20 seconds before serving. Trust me--this tastes BEST warm!
*Note: Mo always had blackberries in the garden because PaPa Fontenot always grew them to make his wine, but the kind you buy at the grocery store work just as well! :-)
Wednesday, April 10, 2013
TEX MEX NIGHT
I was asked to do a TEX-MEX night for our staff, so last Friday night 30 of my Danish colleagues and I gathered in a local school and made all kinds of yummy things together! Many of them have asked for the recipes, so I thought it might be nice to post them here as well!
The greatest thing about doing this night was that I feel like I am leaving a little bit of MY culture in DK after I move back to Texas...... it was an awesome evening!
So enjoy!
________________________________________________
BLACK BEAN ENCHILADAS
The greatest thing about doing this night was that I feel like I am leaving a little bit of MY culture in DK after I move back to Texas...... it was an awesome evening!
So enjoy!
CHICKEN QUESADILLAS
Ingredients:
Flour tortillas
Chicken breasts—cut into strips
Slap Ya Mama—AKA: Your
favorite seasoning—something with SPICE!
Olive oil
Yellow onions (sliced, not chopped)
Red bell peppers (sliced, not chopped)
Grated cheddar cheese
Instructions:
Slice the onions and bell pepper (1 each to serve 2-4
people) and cut the chicken breasts (4 breasts will serve 2-4 people) . Grill
these in 2 separate pans with a bit of olive oil in each. As you are cooking
them, be sure you season them (as much as you would like, depending how spicy
you want the quesadillas to be! But don’t be too conservative because you do
want FLAVOR!)
Once the chicken is cooked through and the veggies are soft,
set aside. Heat a clean skillet (large enough to hold a tortilla) and start
“building” your quesadillas. Fill one half with grated cheese (spread out
evenly). Top with several pieces of the chicken and a good helping of the
veggies. Top with another layer of cheese because remember it is the GLUE that
keeps the tortilla together. Fold in half and set in the heated pan (no oil
needed!) Cook for a couple of minutes until you can see the cheese melting.
Flip and do the same for the other side. Cut it in half and keep it in foil to
stay warm while you cook the rest of them.
Serve with sour cream (feel free to spice it up with a
little chili powder!) and PICO DE GALLO!
_________________________________________________
PICO DE GALLO (for
your Quesadillas, as an appetizer with chips, or to serve with Fajitas!)
Ingredients:
Fresh Jalapeños (seeded & chopped) (2-3—start with 2
in your mix!)
Fresh Cilantro (chopped)
(1 bunch) (and yes, include the
stems too!)
Yellow onions (chopped) (1 large)
Cherry Tomatoes (chopped) (1-2 packages)
Fresh limes (2-3)
Cumin
You may want to make a bigger batch than what you need for
your meal because this tastes better the next day after it sits in the fridge,
so you definitely want leftovers! CHOP all the veggies and mix them together in
a large bowl. Shake in 3 or 4 GENEROUS shakes of cumin and squeeze in the juice
from 2 limes. Mix this well and taste it on a tortilla chip. After you taste
it, decide if you need more jalapeno, more cumin and more lime juice. It all
depends on personal preference. Make this at least an hour ahead of when you
want to serve so it has a chance to chill!
Ingredients:
Corn tortillas
Olive Oil
Cumin
Chicken (chopped/shredded) (3-4 breasts will make about 8
enchiladas)
1-2 cans of black beans
(do not drain them!)
Yellow onions (chopped)
Salsa (as HOT as you like it!)
Fresh cilantro, chopped and SET ASIDE!
Grated “white” cheese (we use Monterey Jack in Texas)
Instructions:
Fry your corn tortillas so they are SOFT and set aside. This
is a VERY FAST Process---only about 1-2 seconds on each side. My recommendation
is you fry them in olive oil that has been seasoned with 2-3 shakes of cumin.
Drain them on paper towels so they are not greasy when you are ready to use
them.
Cook your chicken in a little bit of olive oil. Be sure you
season it well! J
Just before it is done, add your chopped onions and continue cooking until the
onions are soft. Sprinkle 2-3 shakes of cumin on the onions and chicken mix and
then pour in your black beans and 1 cup (3 dl) of salsa. Let this simmer for
about 10-12 minutes so all the flavors come together.
Take off the heat and now you are ready to build your
enchiladas. Lightly oil your baking dish so they do not stick and preheat your
oven to 400F/200C.
Put one tortilla in your hand and fill the middle of it with
cheese. Add the bean/chicken mix on top of the cheese. Just before you roll it
up, put a good-sized pinch on top of the mix…spread it down the middle of the
mix. Roll up and set in your baking dish. Repeat until all your mixture is gone.
Then top your enchiladas with a good handful of more cheese. Bake for about 15
minutes, but check it a couple of times to make sure your cheese is not getting
scorched (each oven is different.) Serve with sour cream!
_________________________________________________
7-LAYER DIP
Ingredients & Instructions on how to build it in your
dish:
LAYER 1: Refried beans (1 can)- an option is to sprinkle a
little chili powder on top of them for a bit more spice!
LAYER 2: Ground meat that has been cooked with 1 yellow
onion and 1 envelope of Taco seasoning
LAYER 3: Corn (2 cans, drained)
LAYER 4: Red onion (chopped)
LAYER 5: Salsa (as HOT as you like it!)
LAYER 6: Sour Cream (with a little chili spice in it!)
LAYER 7: Grated cheddar cheese
REFRIGERATE!!
TORTILLA CHIPS (to serve with it!)
(Optional—Make it an 8-layer
dip and add a layer of chopped black olives BEFORE the cheese!)
When you serve, make
sure you dig down to get ALL the layers in each bite! This is always better
after it sits in the fridge for several hours or even overnight!
__________________________________________________
__________________________________________________
Mathias NeelenApril 10, 2013 at 8:44 PM
Since Slap Ya Mama isn't easy to come by in Denmark, and the average Dane knows jack squat about peppers, I think you might want to include a recipe for a seasoning blend that resembles Slap Ya Mama. Here's mine:
4 parts garlic powder (NOT garlic salt, just dried up, ground garlic)
3 parts cayenne pepper
1 part black pepper
1/4 part dried habanero powder
3 parts salt
I use a clean coffee mill for blending the spices. You can use mortar and pestle as well.
You can leave out the salt, if you prefer to add salt by itself. That allows you to in-/decrease the spiciness without over/-undersalting, and you can leave out the habanero if you can't find it or if you don't like the hot stuff.
Monday, October 29, 2012
Mo's Crawfish Casserole
This, to me, is the Cajun version of COMFORT FOOD.
Give me a crawfish casserole any day over "meat & potatoes"!!
First, while you are preparing your Crawfish mix, you need to cook 2 cups of rice. Once these are done, just set them aside until you are ready to assemble. :-)
Ingredients
2 cups of raw rice
1 large yellow onion, chopped
1 red bell pepper, chopped
1 lb. of crawfish tails (thawed)
Slap Ya Mama (or your own Cajun seasoning)
1 stick of butter
1 can of cream of celery soup
bread crumbs
(While your rice is cooking)
Preheat the oven to 375. Sauté the onion and bell pepper in the stick of butter. Season GENEROUSLY with Slap Ya Mama (depending on your family's ability to handle the heat!) When the veggies are soft, add the thawed crawfish tails and sauté for about 10 minutes, until they cooked through. Add the can of cream of celery soup and then turn down the heat. Let this mixture cook together (on low heat) for about ten more minutes.
While you are waiting, grease a baking dish (9x13 works great) and then sprinkle a thin layer of the bread crumbs on the bottom of the dish.
Take your mixture from the stove and then stir in the cooked rice until your mixture is a LITTLE BIT SOUPY. Be careful that it is not DRY! So add your rice about a half-cup at a time....mixing well.
Now spread your rice/crawfish mixture into your greased baking dish. Then sprinkle another layer of bread crumbs on top.... not too thick- just enough to cover it.
Bake at 375 for 25-30 minutes, until it starts to get a little bubbly. Just don't let your top get too browned.
I serve this with Cajun Green Beans as a side dish-- a yummy meal your family will love!
Tuesday, October 23, 2012
Mexican Rice
I am often asked for my recipe for my Mexican Rice, but it was not until my future son-in-law complimented it that I realized it must be really good. ;-) I believe his words were something along the lines of "this is better than the rice I have had made by real Mexican women"!!
So here goes:
Chop 1 medium yellow onion.
Using a NON-STICK saucepan-- combine the raw onion, 2 cups raw rice, 2-3 TBSPs cooking oil, and 3-4 generous shakes of Cumin.
Cook on medium heat until the onions are soft and the rice is a TINY BIT browned. DO NOT OVERCOOK.
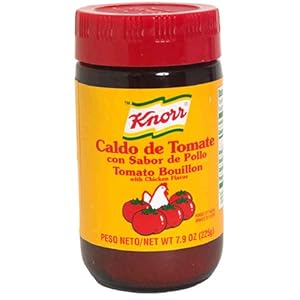 Add 1 can of Ro-tel tomatoes (you decide how hot), 1/2 can of water (using the Ro-tel can), 1 can of chicken broth and 3-4 generous shakes of "Caldo de Tomate" (powdered tomato-- see picture to the right).
Stir everything together, watching it carefully.
As soon as it starts to boil just a bit, REDUCE the heat to LOW and then cover. Don't stir or bother it while it simmers.
It should take about 15 minutes (give or take) for the rice to be ready.
If you want more rice, adjust your chicken broth---but never your water. Do not ever add more than the 1/2 can of water.
If you are making this for dinner and want to prepare it early, do all the instructions above and then put the rice in your electric rice cooker (on WARM, not on Cook) and it will keep for a couple hours until you are ready to serve.
So here goes:
Chop 1 medium yellow onion.
Using a NON-STICK saucepan-- combine the raw onion, 2 cups raw rice, 2-3 TBSPs cooking oil, and 3-4 generous shakes of Cumin.
Cook on medium heat until the onions are soft and the rice is a TINY BIT browned. DO NOT OVERCOOK.
Stir everything together, watching it carefully.
As soon as it starts to boil just a bit, REDUCE the heat to LOW and then cover. Don't stir or bother it while it simmers.
It should take about 15 minutes (give or take) for the rice to be ready.
If you want more rice, adjust your chicken broth---but never your water. Do not ever add more than the 1/2 can of water.
If you are making this for dinner and want to prepare it early, do all the instructions above and then put the rice in your electric rice cooker (on WARM, not on Cook) and it will keep for a couple hours until you are ready to serve.
Wednesday, September 12, 2012
Baked Pasta in Béchamel Sauce
Olive oil
1 large onion, chopped
3 garlic cloves, minced
(or 3 good shakes of garlic salt)
1 red pepper, chopped
1 pound of ground beef
SEASONINGs (you KNOW what
my choice is!)
Large jar of Spaghetti
sauce (I make my own sauce, but this is an easy substitute.)
Dried red pepper flakes
Fresh
Cilantro-chopped
Pasta, cooked as per
instructions on the box (I use corkscrew.)
grated parmesan cheese
Saute the meat, onions and
peppers in olive oil with your favorite seasonings until the meat is browned
and the veggies are soft. Add the garlic and cook about 2 minutes
longer.
Add the spaghetti sauce /
Make your own and turn down the heat. Simmer for about 20 minutes. Begin to
boil the noodles and to make the Béchamel Sauce at this point. Add the chopped
cilantro right after you remove it from the heat.
Béchamel Sauce
5 TBSP butter
3 TBSP flour
2 cans condensed
milk
2 tsp nutmeg
2-3 shakes of Slap Ya
Mama
Melt the butter in a
saucepan and add the flour. Cook out the flour for a few minutes over low
heat, and then slowly add the condensed milk whisking it in. Continue to
whisk the mixture until thick. Add the nutmeg and season to taste.
 Assembling your Baked Pasta
Place
the cooked spaghetti noodles in a LIGHTLY GREASED casserole dish (13x9) and mix
in the spaghetti sauce mixture and a third of the bechamel sauce. Mix
well and then top with the rest of the bechamel and 1 cup of grated parmesan
cheese.
Bake
in a pre-heated oven at 375 for 25 minutes until the cheese has melted.
Serve
with garlic bread and your family will LOOOOOVE you!
Subscribe to:
Posts (Atom)